| The majority of all e-mail I get is
about properly installing KillTimer. Here is some
advice on how to get KillTimer up and running. =) Windows
Archive
Step 1:
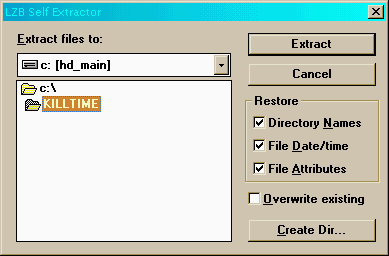
Run the downloaded killt49.exe file. A window
similar to the following should appear:

Step
2: Use the drive and directory selection
controls to reflect where you want to install
KillTimer. You can also create a new directory by
clicking the "Create Dir..." button.
Step
3: Press "Extract".
KillTimer's main files are extracted to the
selected directory. After this step is complete,
you can delete Killt49.exe from your system.
You
can then use Windows Explorer to navigate to the
directory you installed KillTimer in, and run the
KillTime.exe there to start KillTimer.
DOS Archive
Step
1: Run the downloaded killt49d.exe file and run
it.
Step
2: The killt49d.exe file extracts KillTime.exe
and ReadMe.wri to the current directory.
You
can then delete killt49d.exe and run the
KillTime.exe file there to start KillTimer.
|